Sunday, November 13, 2011

Gotta love a BARGAIN!

Yep, I did it. I did exactly what I swore I wouldn't do...two bloggies in, and I just...couldn't...hang. It's certainly not due to a lack of things to share, and although I'd like to say it's because I'm busy (which in my defense I truly am), the reality is that...well, it really doesn't take that long to write a blog. But whatever the reason, I hope you don't hold it against me, because alas...I'm baaaAAAAck.

Warning: this blog is not about cake pops.
Sorry guys, I've had a lot of requests for cake pop tutorials and tips, and I can promise you that I will definitely write about them in the near future. What I can't promise is how 'near' it will be :) I kid, I kid! I am doing some for a shower next weekend so I will take pics and share then. PINKY PROMISE.

Okay, now let's get to the good part.
Anyone else in love with Pinterest lately? For any fellow Junkies, it is a must-have. There are so many incredible crafting/baking/style ideas. My latest project was born from a picture I saw on the site.

So basically I saw a pic of an old/junkie TV stand turned into trendy/modern ottoman.
Then I saw some kid photos done with bright colored props outdoors.
I decided to combine the two ideas, and ummm...well...it's was sort of magical :)))

Here we go:

Find old junkie prop at a local thrift store

This chair was less than $3.
Remember when searching for items to think of their POTENTIAL, not their current state.

Go to the craft store and pick up some material and spray paint (or regular paint, or stain or whatever you desire).
I encourage you to leave your comfort zone and spice up your life with a fun pattern. There were SO many amazing fabrics when I went in search for these orange polka dots, that I was inspired to have a fabulously decorated house (except the whole 'having a house' part through a damper on my party...oh well, a girl can dream right?).

Clean off the furniture and take off the old material part (if there is one).
Put the new material on.
When I took the old material off, I just used it as a template for cutting the new material to make my life easier. You can always measure it out...but really...who wants to do that?!
Once you cut the new fabric, just put the old filling (or you can replace it if you want) back on and fold it over like you would a present, stapling it with a staple gun as you go.
Voilaaa! Already looking better!!!

At this point you can sand down the piece, or if it's not too shabby, get right to the painting part. I used Krylon Hobby Spray Paint, but you can use whatever you fancy.

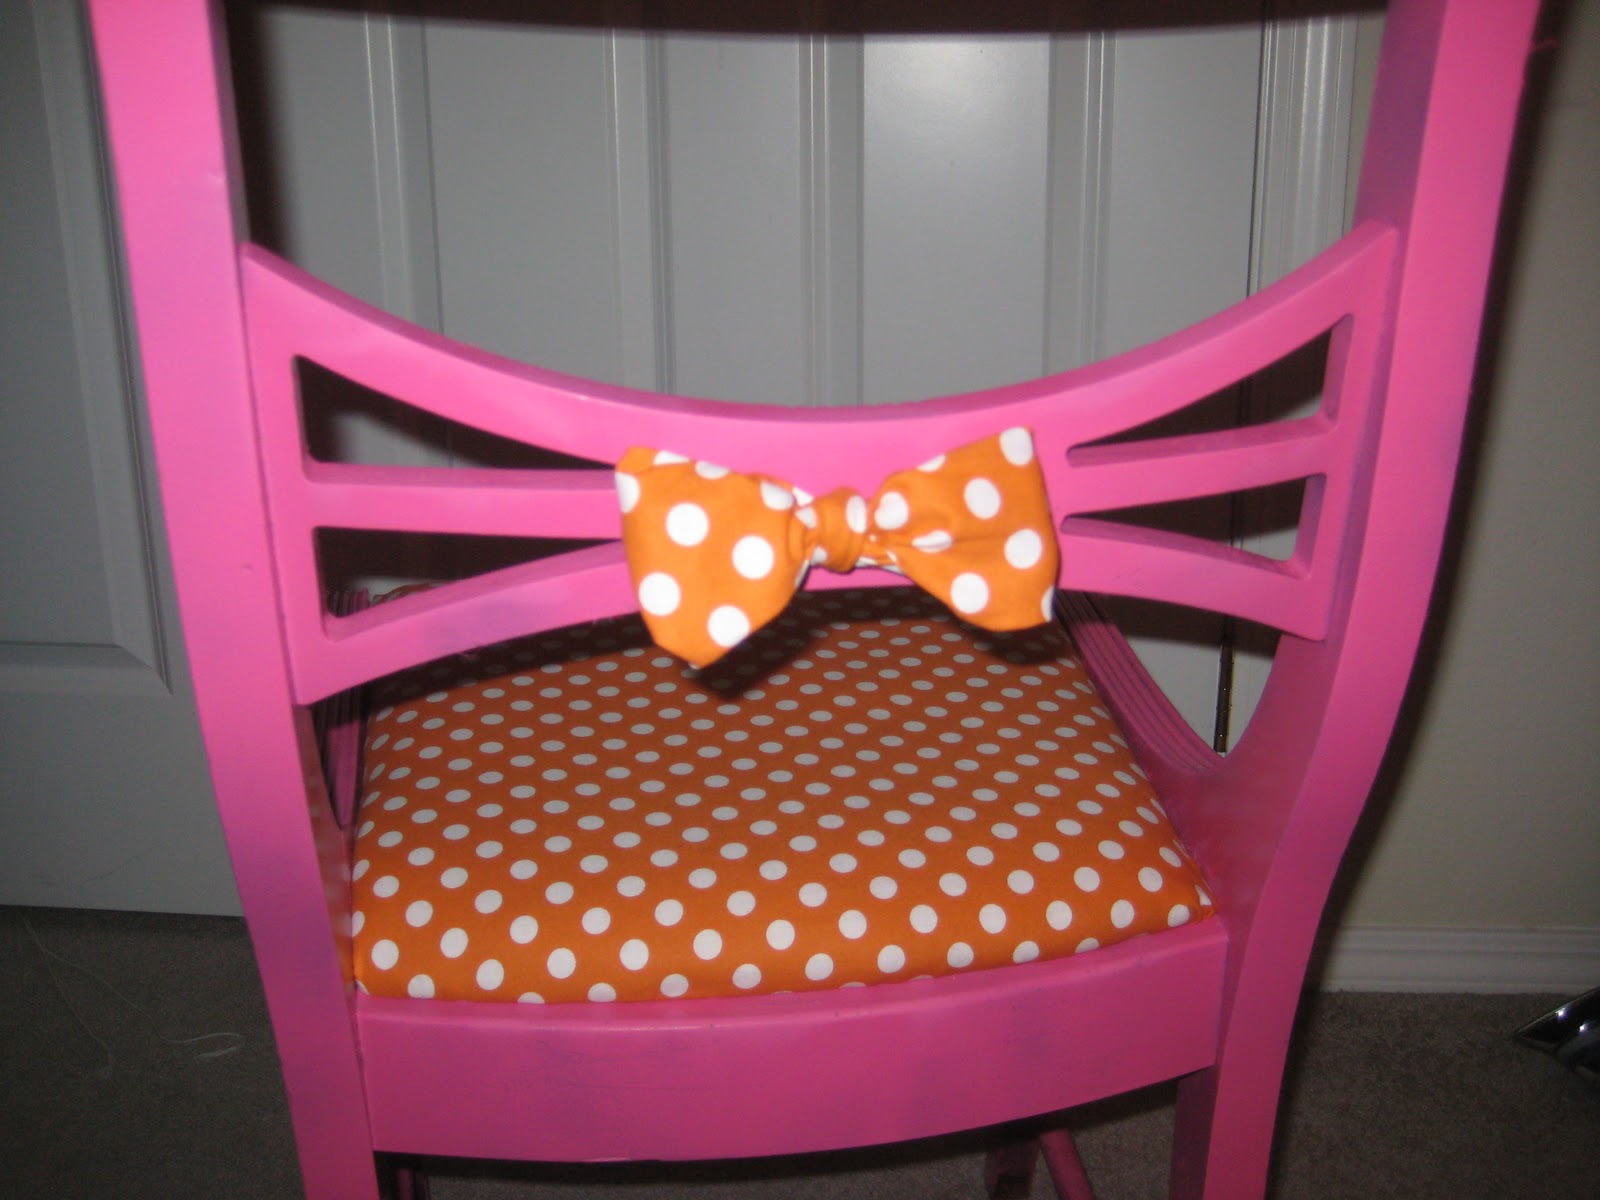
And here you have it folks...a super cute chair, done with minimal effort and it was less than $10!

I didn't like the middle part of the chair back, so I looped in some extra fabric and tied it in a bow in the back so that it was hidden. Pinterest had all kinds of fun ideas like hot-gluing funky buttons or gems to the back of the chair for unique twists to photo props.


Now the REALLY fun part is using the chair! I had a mini photo-sesh and used this chair as a prop. The colors for the chair are orange and pink because the pics are going into her room which is going to be themed with...you guessed it...bright orange and pink :)))

Here is a peak at some of the pics-


Adorable, right!!????
So get to it! Re-do some kitchen stools, or add some joy to your computer chair...there are so many ways to add some spunk to dull or outdated furniture. Happy crafting!


And seriously, I've never broken a pinky promise. Cake-pops soon.

Tuesday, August 30, 2011

Baby Fever = Headbands Galore

I. LOVE. BABIES. This proclamation is not to be confused with the average "Oh, I love babies" that people casually say as they see a baby do something cute. I really truly love them. I love kids in general, but babies have a sweet spot in my heart. I have a unique ability to love other people's children as if they were my own. So for a 'baby-lover' like myself, this is a pretty lovely time in my life, as it seems everybody, let me restate that, EVERYBODY, is having them.

A few months ago I heard about this amazing baby boutique in Sumner called Sugar Babies. With a few little girls on the way, I went with a dear friend to check it out. Although I fell in love with almost everything in the store, my inner Creative Junkie kept thinking, 'I bet I could make this!'.

Of all of the items I wanted to attempt, first on my list was the obnoxiously large, incredibly adorable headbands. So I ended up buying one, and then proceeded to take it home and inspect it to see how I could go about making my own. Turns out they are pretty easy.

First go to your local craft or fabric store (or your craft closet for fellow junkies), and pick out some cute ribbons. You can also pick up 'centers' for your bows, and the stretchy headband fabric (buying a plain headband works just as well), and clips for the back too.
TIP: If you are just making one or two, get ribbon by the yard so you don't have to buy a whole spool!

Then, play around and make up some fun bows! You can get creative, and keep in mind, the bigger and more outrageous, the better (in my humble opinion that is). 
TIP: You can use scrapbook embellishments, old jewelery, beads etc. for the centers.

Using one of my favorite crafting tools, the handy-dandy hot glue gun, glue your bow onto a clip. Now you don't have to do this, you can always attach the bow directly to the headband- however putting them on clips makes it so you can mix and match bows/headbands!


Once you have sewn your headband together, simply clasp the bow to the headband, and there you have it, your very own, super cute headband. Or, if your obsessive like me, TONS of super cute headbands.

Then all you need is a little munchkin to model your work!


I can't decide if this helps my 'baby fever' or just makes me want one even more, but I had a blast making them and these headbands make great shower gifts, or are fun for holidays or portraits too!

Note: If you aren't super crafty, you can also buy fake flowers (gerbera daisies work great) and just hot glue it onto a headband for an easier, still fabulous, version. It's still cheaper than buying them!

Friday, August 19, 2011

My First Blog: OF COURSE it would be a disaster!

Still riding the high from a successful baby shower, one that included gobs of praise and encouragement of my mad skills (shout out to Napoleon Dynamite), I finally decided today would be THE day.

And by 'THE day' I mean the day I start blogging. Obviously. 

The past few months have been filled with success after success of crafting, baking and party throwing shenanigans. I pride myself on continuously spending far too much time thinking about small details that nobody else probably even notices. Yes, I know it's unnecessary. Yes, I will continue to do it.

Today is my brother's birthday. I have three brothers, all of which are older than me. Yes, that's right, I'm the baby girl. And as such, it is only natural that I look up to them (thankfully I grew out of the stage where I wanted to BE them in middle school). So needless to say, this special day calls for many moments, minutes, hours, of the aforementioned contemplation process of 'what and how' I will do for his birthday dessert. Now if you read the 'About Me' portion of my blog, you know that my Grandma is an insanely amazing cook/baker. She is also going to be attending the b-day bash, and will also be bringing dessert. Meaning I have to come up with something AMAZING just so that I can put it next to her dessert (forget trying to out-do her, it's not going to happen). What to do, what to do...

After contemplating what to make for far too long- I came up with two ideas. Chocolate whoopie pies with peanut butter filling, and pink lemonade cuppy-cakes (if baby talk bothers you, too bad, it makes me happy). 

Since my first attempt at whoopie pies turned out well, I decided I would make my own recipe this time around. And there my friends, lies the problem. Originally I planned on sharing my amazing recipe, for my amazing whoopie pies. Perfect for my first blog. 

I was so excited, had my camera ready for the close-up..but...but....but....

I made, the UGLIEST whoopie pies ever. EVER.
All of the powdered sugar was my attempt at hiding the hideousness of the pie. Clearly it didn't work.
Anyone want to make these? Yeah, didn't think so. 
Until we meet again, R.I.P. Whoopies. 

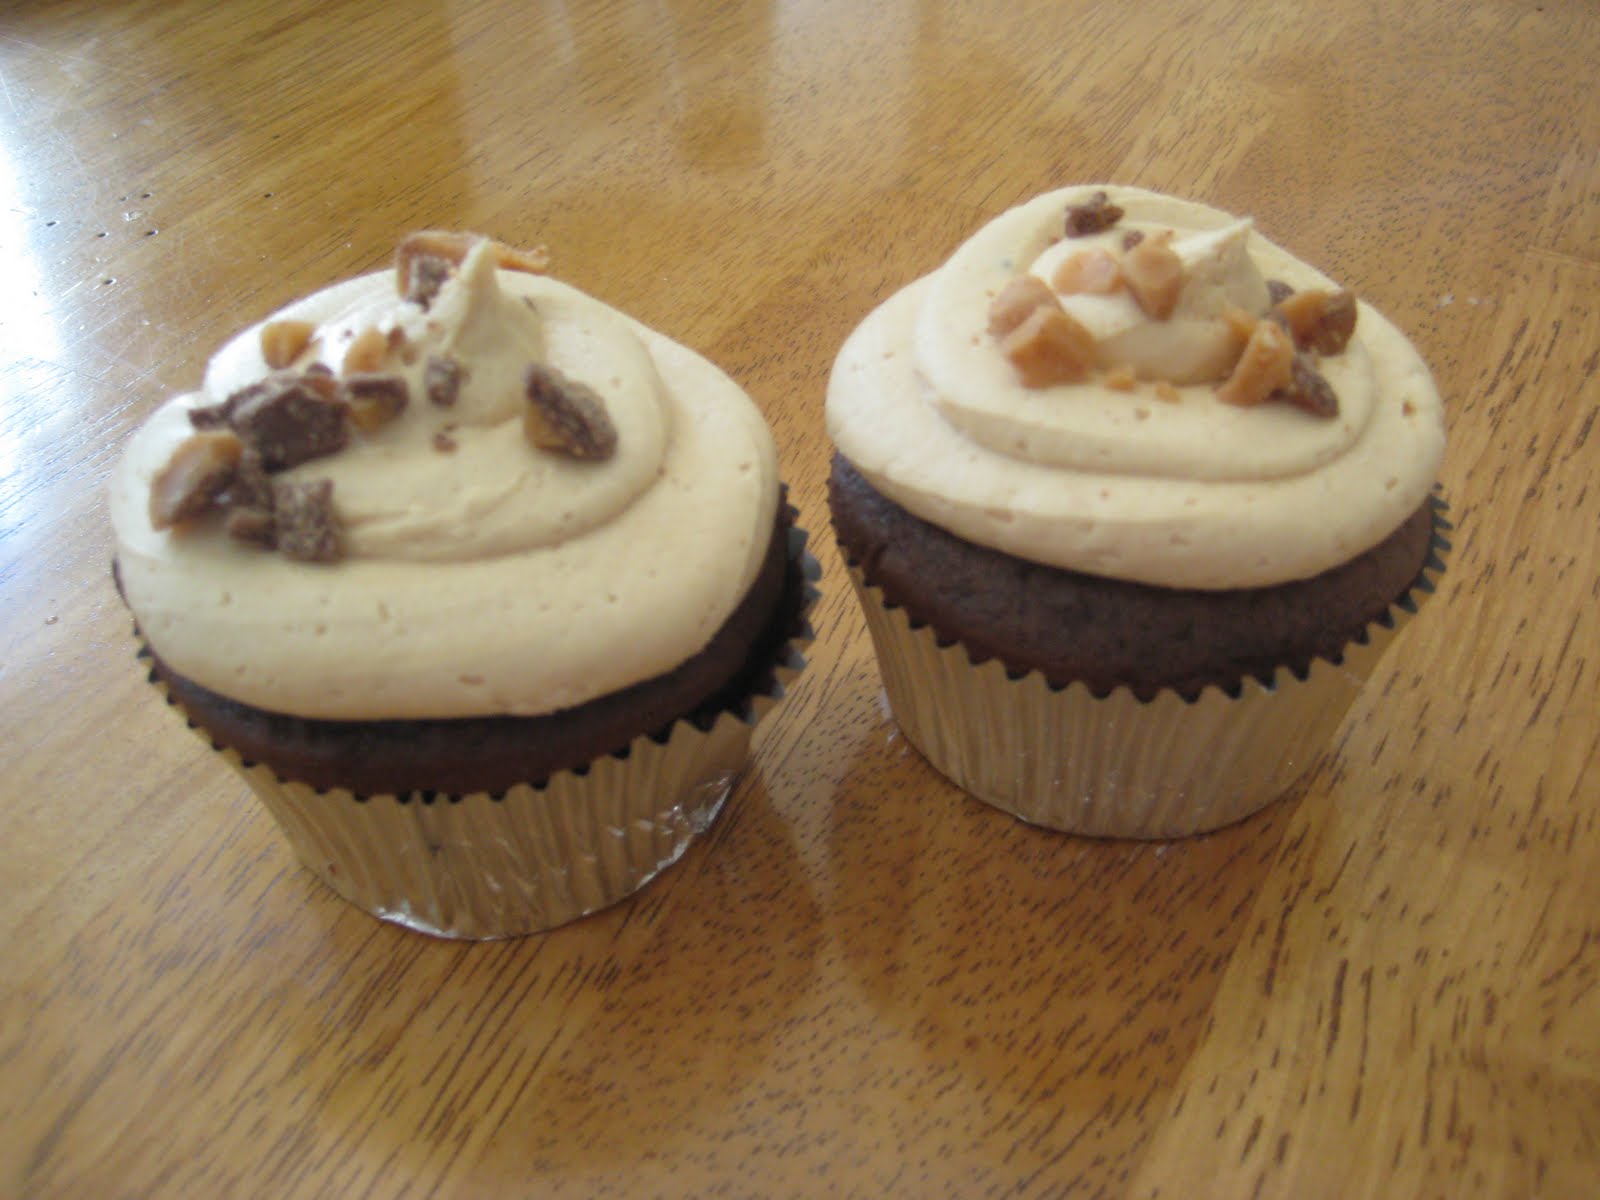
Thankfully, I made a quick recovery and used the rest of the batter for chocolate/peanut-butter cuppy-cakes. And they ARE amazing. 
Now that's more like it.
At last, I can still leave you with a tasty recipe.

Best peanut-butter frosting you've EVER had:
1 cup creamy (or crunchy would be fun to try) peanut butter
1 cup marshmellow creme
1 cup butter
2-4 cups powdered sugar
1-2 tbsp whipping cream 

Whip the PB, creme and butter, add the sugar and continue beating, then add the whipping cream until desired fluffiness. If it's too thin, add more sugar. If too thick, add more whipping cream. It should end up looking like this:
You can pipe it on your cuppy-cakes with a freezer zip-lock bag, just cut a hole in the end and fill it, and viola!

Hmmmmpphhh, now I need to attempt these pink lemonade cuppies...I don't know if my ego can handle two disasters in one day, so these babies BETTER be legit.